Start Using TalkRev With Your Gift Card: Activation, Setup, and First Steps
A TalkRev Gift Card gives you a full year of an AI-powered customer support assistant — and redeeming it is fast and simple. This guide explains what your gift includes, how to activate your AI Chat Agent plan step-by-step, and how to start using TalkRev to answer customer messages automatically.
Someone just gifted you a full year of TalkRev — an AI assistant that replies to your customers instantly, handles bookings, shares availability, and saves you hours every week.
This guide shows you exactly how to redeem your gift, what your plan includes, and how to get your AI working on your website in just a few minutes.
🎄 What You Get With Your TalkRev Gift Card
Your gift unlocks 12 months of the Annual Plan, including:
✔ Core AI Chatbot Engine
Your assistant answers customer questions, handles appointment requests, and responds instantly — even during peak hours.
✔ Customizable Website Chat Widget
Match your brand colors, edit the welcome message, and install the widget on your site.
✔ Basic Knowledge Base
Upload FAQs, service info, policies, and documents so your agent always replies accurately.
✔ Standard Integrations
Connect your booking link, calendar, or website in seconds.
✔ Email Support
Get help whenever you need it.
And yes — your full year is already paid for thanks to your gift card.
🎁 How to Redeem Your Gift Card
Redeeming your TalkRev gift only takes a minute.
1️⃣ Open the gift email
You’ll see the sender’s message and your activation link.
2️⃣ Click “Activate your gift”
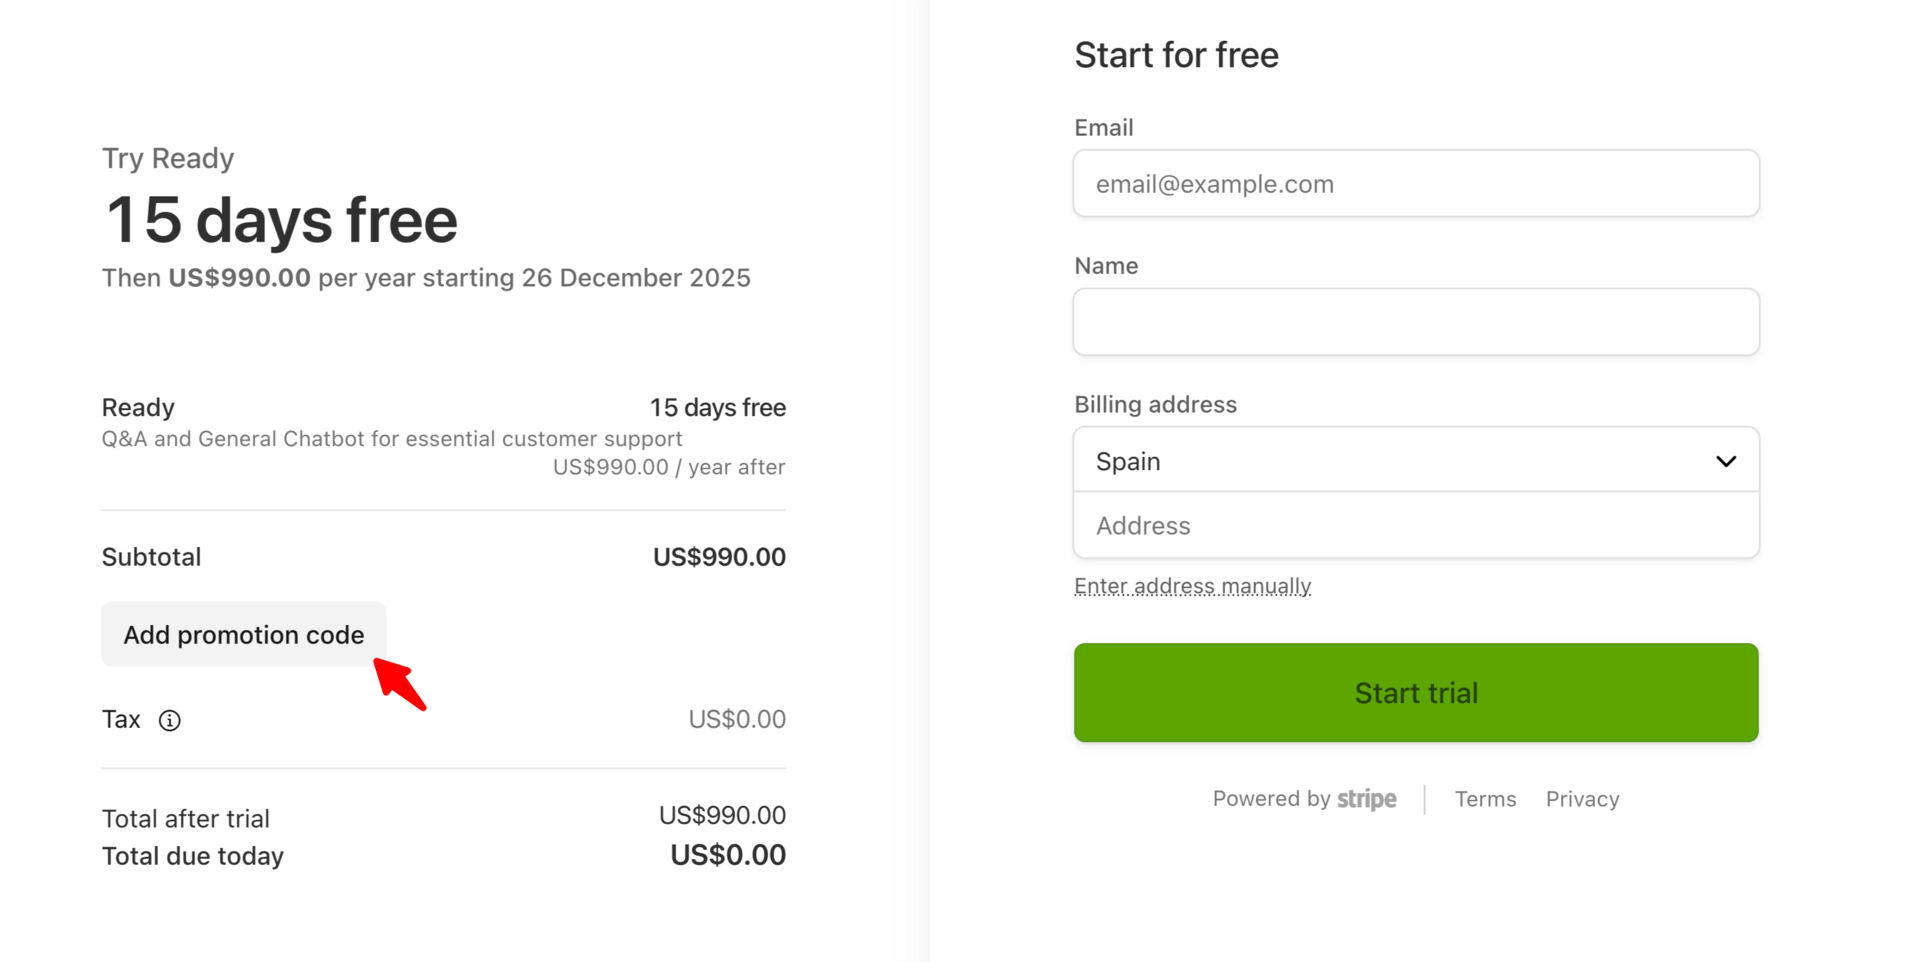
This takes you directly to the secure Stripe checkout page.
3️⃣ Enter your unique gift code
Paste your code into the promotion code field.
You’ll see the price drop to:
Total: $0 Annual Plan: $990 → $0 for the full year
4️⃣ Click “Start Trial”
That's it — your TalkRev dashboard unlocks instantly. No additional payment required.
🚀 Start Using TalkRev in 2 Minutes
After activation, you land inside your dashboard. Here’s what to do first:
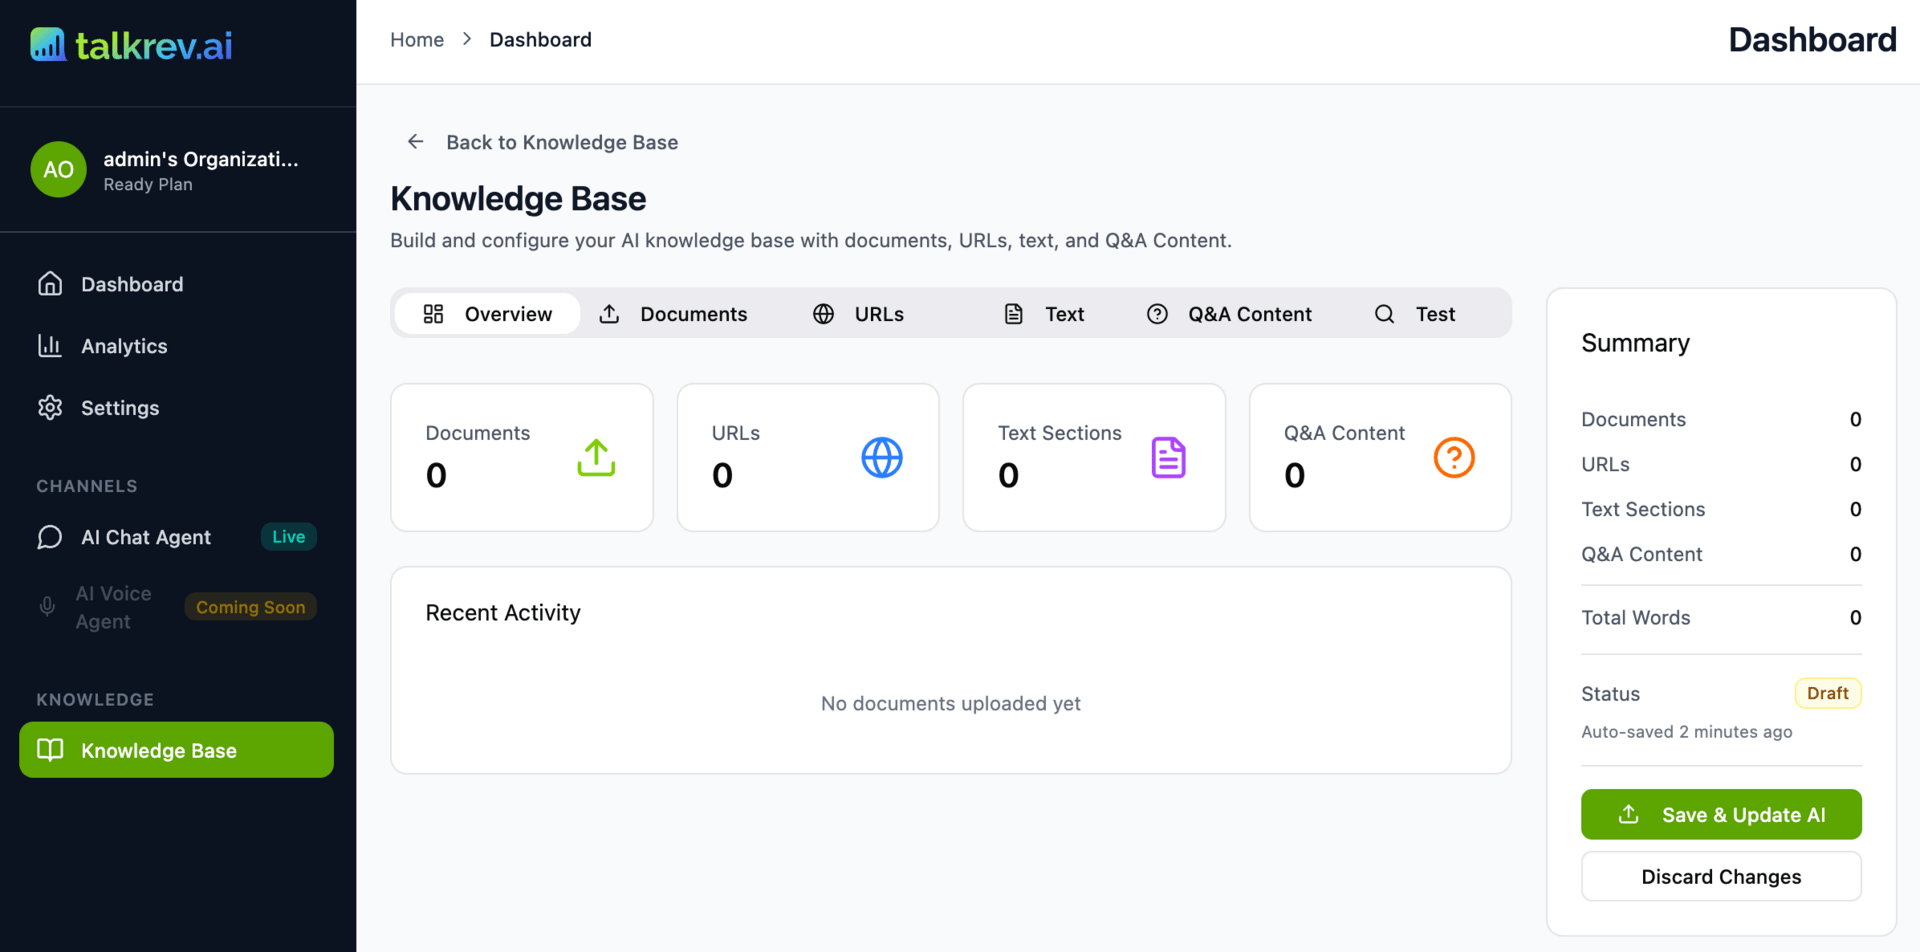
1️⃣ Add key information

Your agent becomes smarter with:
your website link
your booking/calendar link
any FAQs or details customers usually ask about
Upload these inside the Knowledge Base as text, documents, URLs, or Q&A entries.
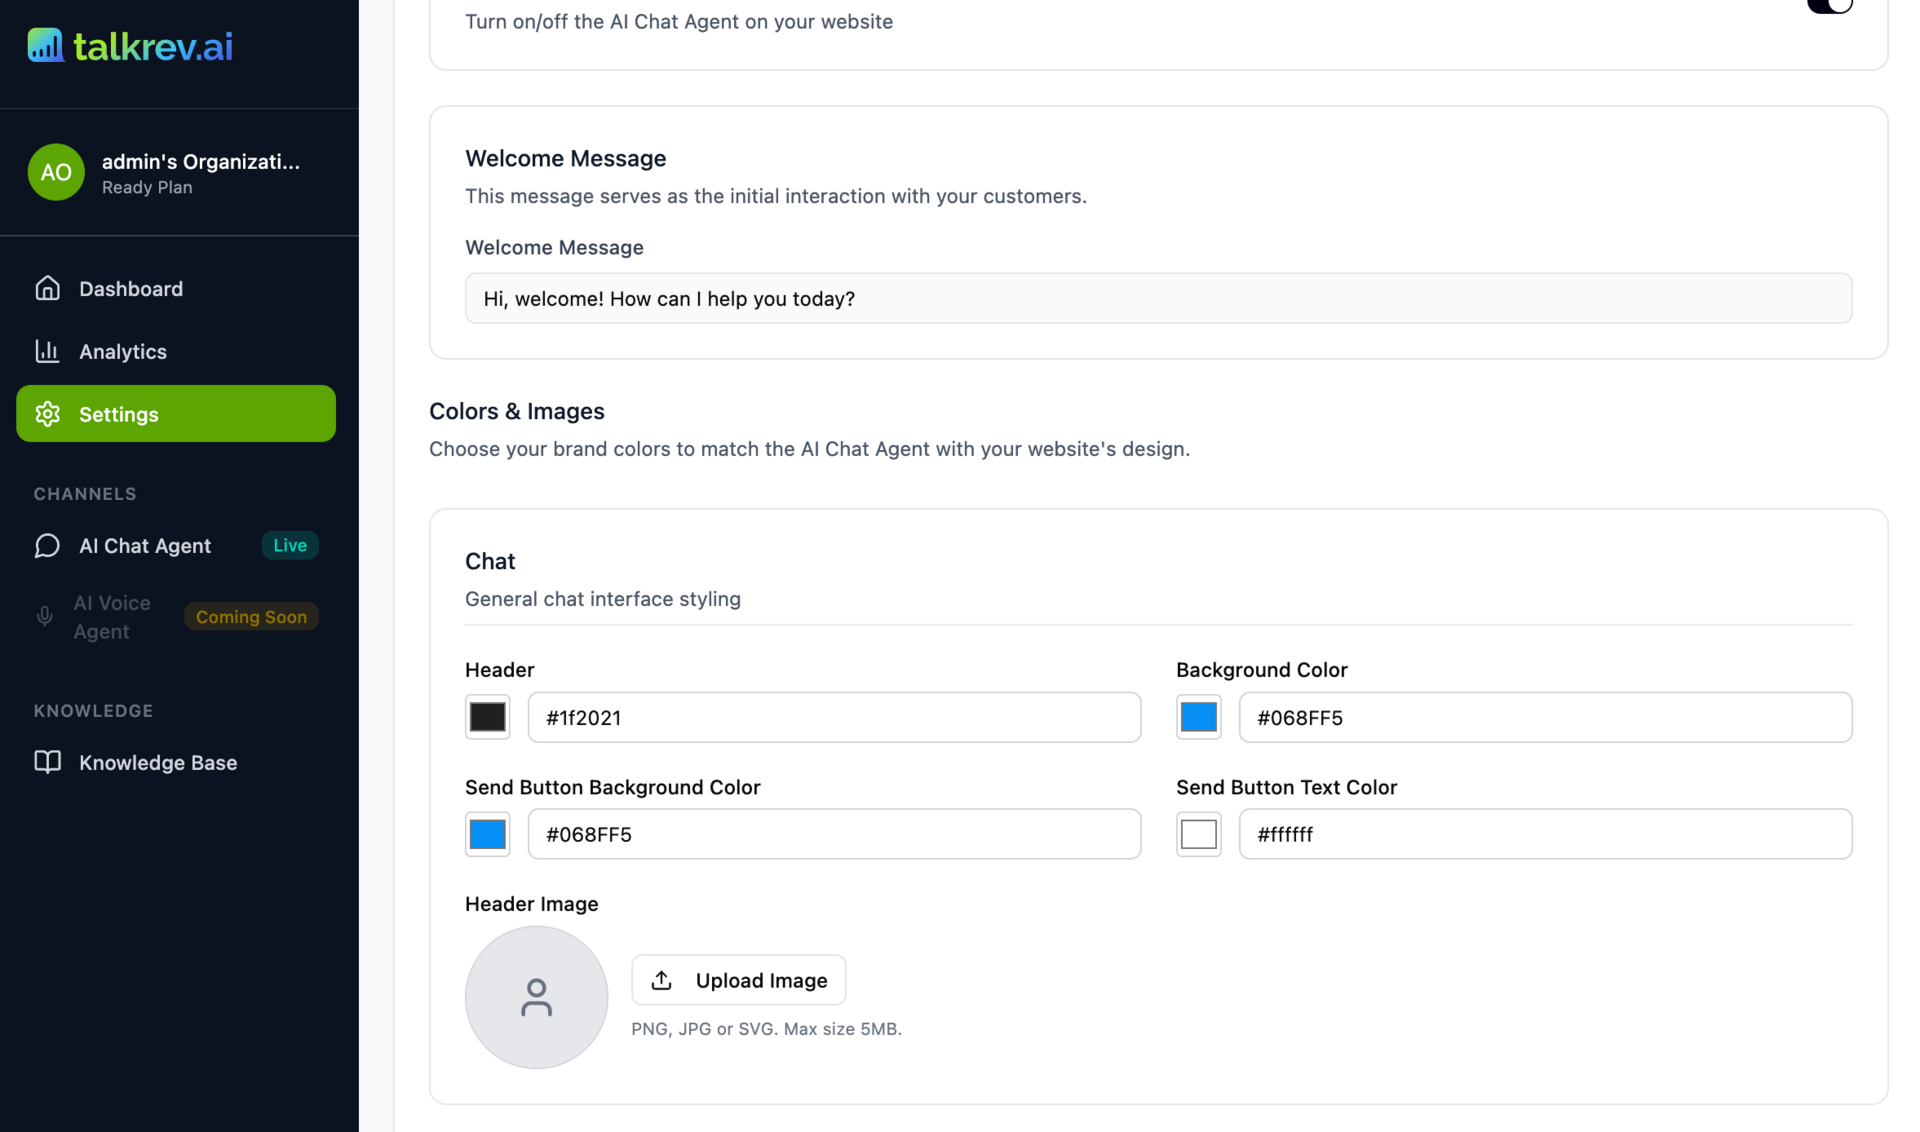
2️⃣ Customize your chat widget
Go to Channels → AI Chat Agent → Setup AI Chat Agent to:
change the color palette
update the welcome message
upload your avatar

This ensures the widget matches your brand identity.
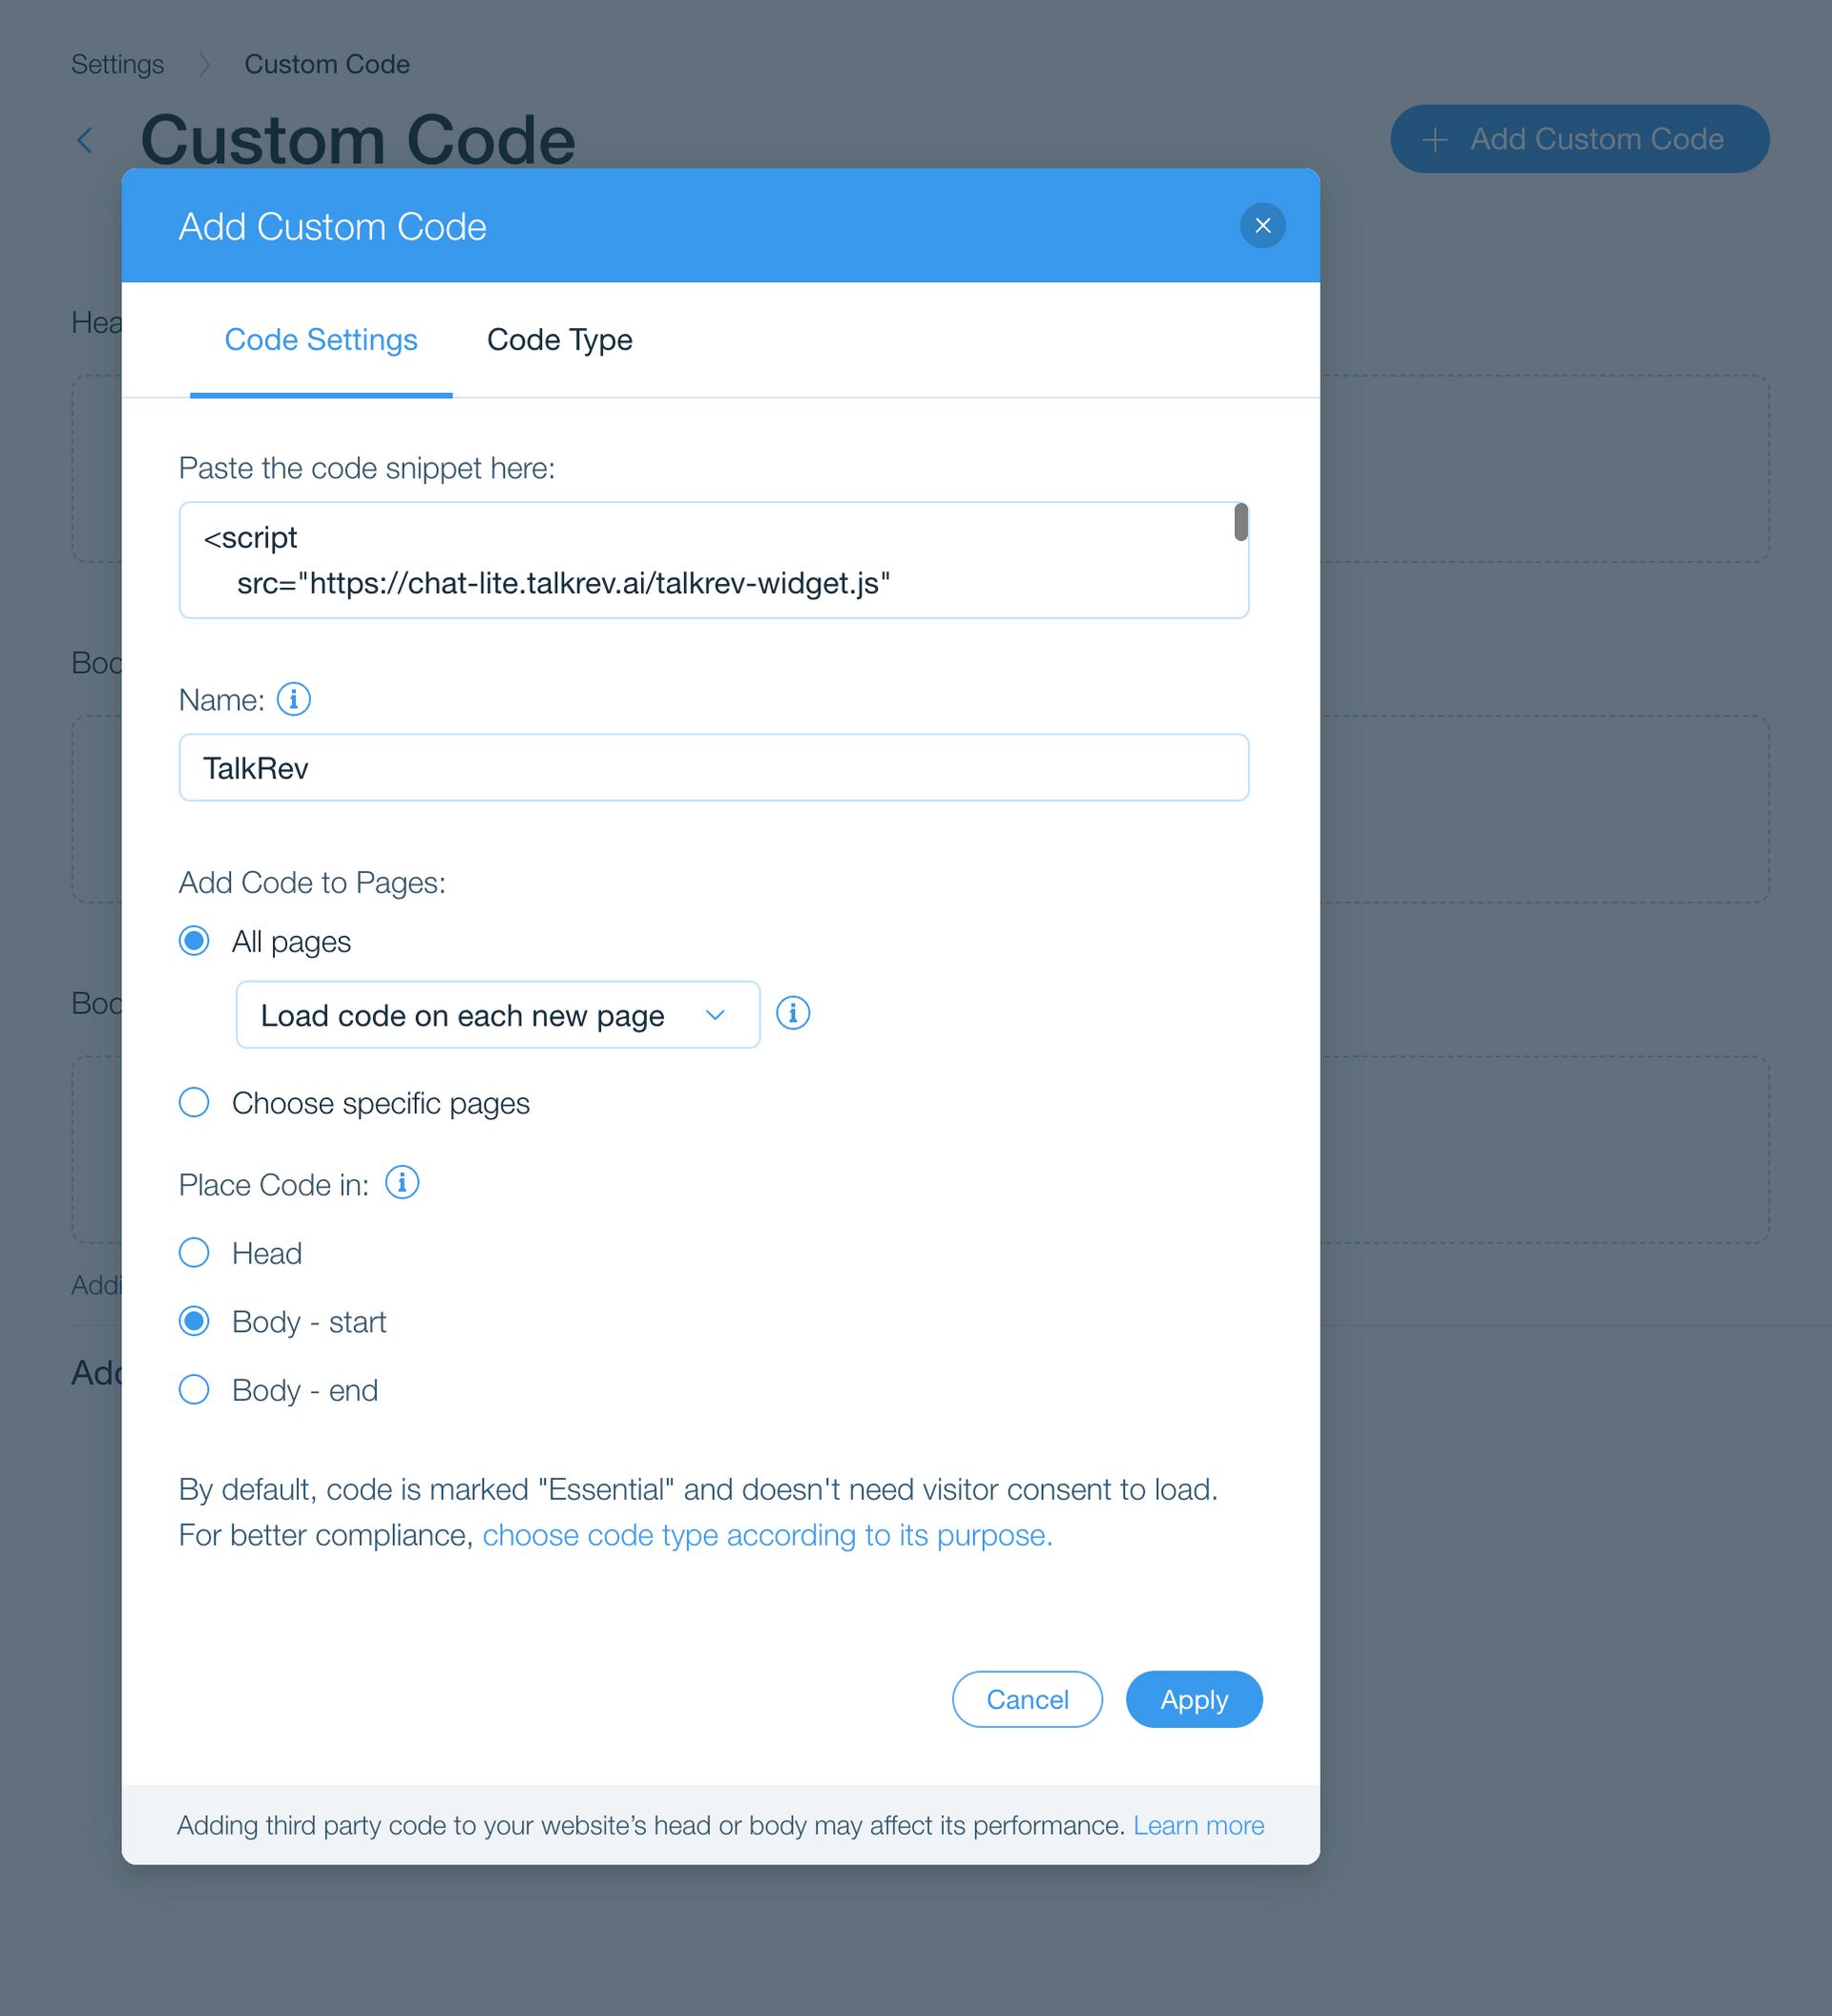
3️⃣ Install the widget on your website
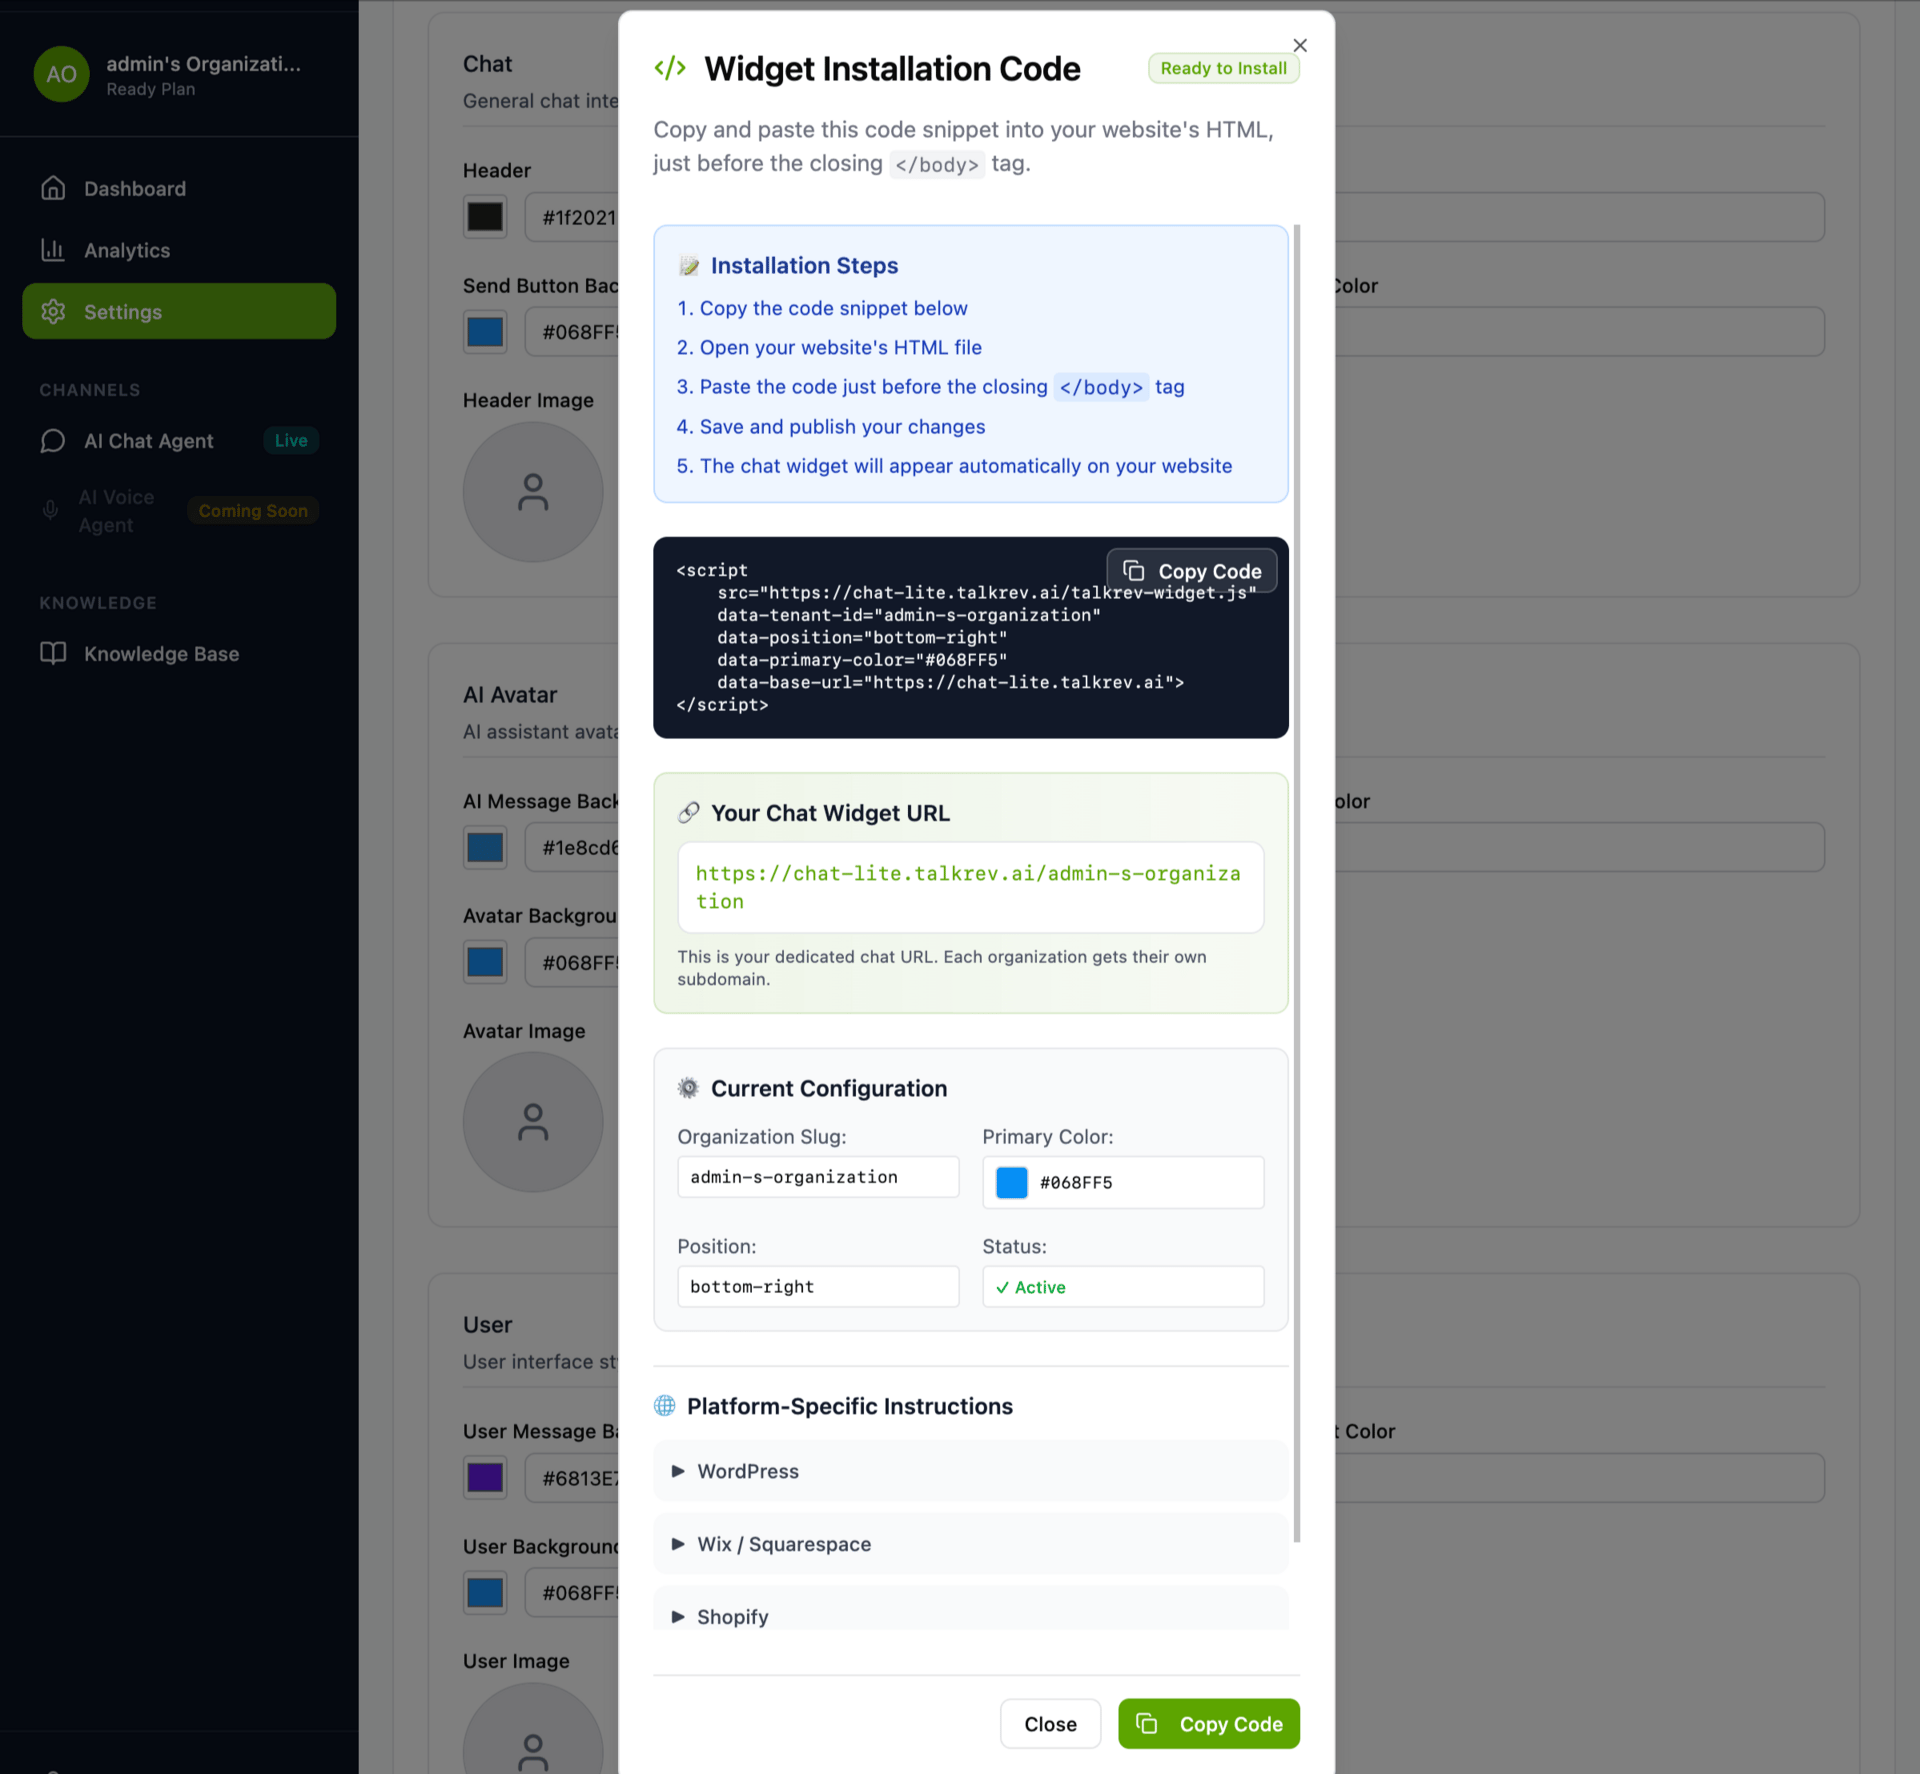
Click Get Installation Code and paste it into your site before the closing </body> tag.
Platform-specific guides are included for:
WordPress
Wix / Squarespace
Shopify
Custom HTML sites
Once installed, the chat widget appears automatically.

And you’re done! 🎉
Your AI assistant is now live.
You can test the chat agent yourself, update your knowledge base anytime, and customize the widget whenever you need.
Your gift card doesn’t just unlock an AI assistant — it gives you insights that help your business grow smarter every day.