
TalkRev gives your business an AI agent that answers customers and books appointments for you — on your website, over the phone, and by text message. It uses your own information, not generic answers, and everything it does lands in one dashboard.
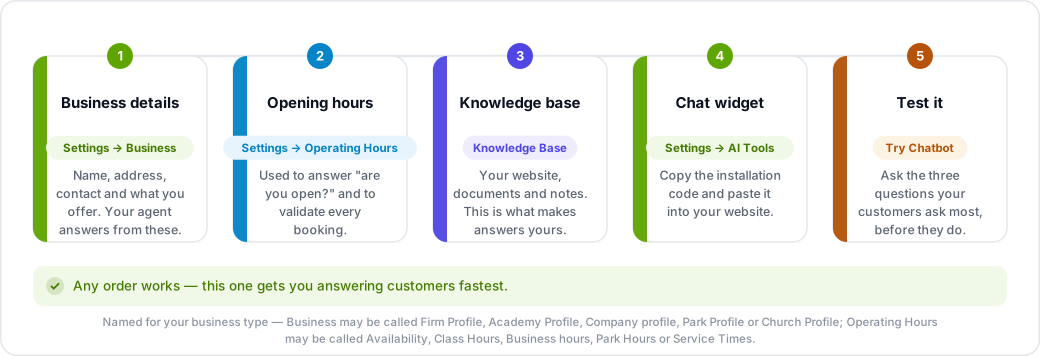
The five things to set up first
You can do these in any order, but this is the order that gets you answering customers fastest.
1. Fill in your business details
Go to Settings → Business and complete your name, address, contact details and what you offer. Your agent reads these directly — this is where it gets the answer to "where are you?" or "what do you do?".
2. Set your opening hours
Settings → Operating Hours. Your hours are used to validate every booking and are given to the agent, so it answers "are you open on Sunday?" from your real schedule.
3. Add your knowledge base
Open Knowledge Base in the sidebar and add your website, your documents, or text you write yourself. This is what turns a generic assistant into one that knows your prices, your policies and your services. See Upload and refresh your knowledge base.
4. Put the chat widget on your website
Copy your installation code from Settings → AI Tools → AI Chat Agent and paste it into your site. There are step-by-step guides for Wix, Shopify and every other platform.
5. Test it before your customers do
Use Try Chatbot in the chat settings to talk to your own agent. Ask it the three questions your customers ask most. If an answer is wrong, the fix is almost always in your knowledge base or your custom instructions.
What you get depends on your plan
Voice (phone numbers and calls) needs the Engage plan or higher. Third-party integrations such as Google Calendar need Rev or higher. On the Professional pricing, third-party integrations are part of Professional and not of Personal. If a section is missing from your sidebar, see Why can't I see a menu item?.
Where things live
- Settings → AI Tools — how your chat and voice agents behave, and your widget installation code.
- Settings → Business — the facts about your business that the agent uses.
- Settings → Operating Hours — weekly, seasonal and one-off opening times.
- Settings → Integrations — Google Calendar, Stripe, Shopify and more.
- Settings → Team — colleagues and their roles.
- Settings → Plan & Billing — your plan, usage and invoices.
- Knowledge Base — everything your agent knows about you.
- Analytics — conversations, bookings, conversion and revenue.
Some sections are named after your type of business. Business may appear as Firm Profile, Academy Profile, Company profile, Park Profile or Church Profile; Operating Hours as Availability, Class Hours, Business hours, Park Hours or Service Times; Booking Management as Appointment, Enrollment, Demo or Ticket Management; and Team as Advisors or Providers. The name changes, the settings are the same.